 By Graham Fisher
Updated November 2026
How much baby proofing is necessary depends less on your budget and more on how mobile your child is, what is within reach, and which hazards are actually present in your home. For most toddler homes, the answer is a focused set of fixes: secure the top hazards, cover the gaps that a climbing child can reach, and recheck every few months as your child grows. This guide shows you how to decide what your home needs.
Start With Your Child’s Stage of Movement
Your child’s abilities set the baseline. A baby who rolls and sits needs fewer measures than a toddler who climbs, opens drawers, and reaches counters. Most hazards become real once a child can pull up, walk steadily, or open a cabinet, which often happens between 9 and 18 months. Plan your proofing around the next skill your child is likely to gain, not only the one they have now.
Shopping for one? See our guide: 5 Best Buy Buy Baby Child Proofing Products for Cabinets and Drawers (2026).
Identify the Hazards That Really Matter
Not every risk needs the same response. Focus first on hazards that can cause serious injury quickly:
- Stairs, which need a gate at the top and, ideally, the bottom
- Furniture and TVs that can tip, which need anchors
- Cabinets holding cleaners, medicines, or sharp items
- Exposed electrical outlets within reach
- Water sources, including the toilet, bathtub, and buckets
- Hot surfaces and stove knobs
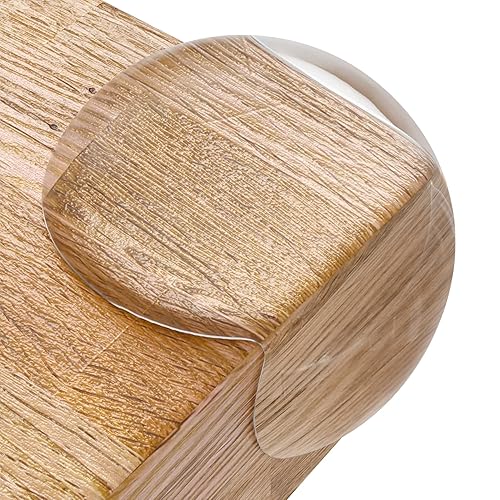
Lower-priority items, such as sharp table corners or loose cord wraps, still deserve attention, but they can usually wait until the high-risk items are done.
Match Your Effort to Each Room
A practical approach is to treat each room with a level of effort that fits its risks. The table below shows a reasonable starting point for most homes.
| Room | Priority measures | Lower-priority measures |
|---|---|---|
| Kitchen | Cabinet locks for cleaners, stove knob covers, gate at the entry | Drawer organizers, appliance cords kept short |
| Bathroom | Toilet lid lock, outlet covers, bath water temperature set below 120°F | Non-slip mats, cabinet latches for toiletries |
| Living room | Furniture anchors, outlet covers, cord management | Corner guards on coffee tables |
| Bedroom | Dresser anchors, cord blind safety, bed rail check | Closet door latches |
| Stairs | Pressure-mounted or hardware-mounted gates | Stair runner grip strips |
Check the manufacturer’s instructions for any product you install, since weight limits and mounting methods vary.
Decide Whether a Full Proofing Plan Is Worth It
You likely need a full plan if you have a home with several levels, a pool or hot tub, pets with feeding bowls in reach, or grandparents and sitters who will be caring for your child. A lighter approach may be enough for a single-level apartment with few cabinets within reach. Many families use a checklist to confirm coverage. You can read about a room-by-room approach in What to Expect Baby Proofing: A Room-by-Room Guide for Toddler Homes, and a broader set of steps in Safety Proofing Home for Baby Checklist: 12 Room-by-Room Steps.
Step-by-Step Process
- Get down to your child’s eye level and crawl through each room, noting what they can reach or open.
- Mark every outlet, cabinet, stair, and furniture piece that could tip or be climbed.
- Install stair gates and secure furniture anchors first, since falls cause the most serious injuries.
- Add cabinet locks and outlet covers next, prioritizing areas with chemicals or medicine.
- Recheck the home every few months and after each developmental milestone.
If you want outside help, Baby Proofing Home Services: What They Cover and How to Choose One explains what professionals typically handle.
Recommended gear
Several common items cover the highest-priority hazards. A basic set of cabinet locks keeps cleaners and medications secure, and a stair gate is the single most important piece for homes with steps.
- Cabinet locks, which prevent curious hands from opening chemical and medicine storage. View on Amazon
- Stair gates, which block access to steps at the top or bottom of a staircase. View on Amazon
- Furniture anchors, which secure dressers and TVs against tipping. View on Amazon
Common Mistakes
- Waiting until your child is already mobile before starting, when many hazards are already reachable.
- Installing a pressure-mounted gate at the top of stairs, where it can fail under force.
- Assuming a cabinet lock works without testing it from your child’s side.
- Overlooking grandparent homes, daycare, and car seats, which still need checking.
- Covering every outlet and corner and ignoring the few hazards that carry real risk.
FAQ
Do I need to baby proof every room?
Not necessarily. Focus on rooms where your child spends time and where serious hazards exist, such as the kitchen, bathroom, and stairs. Living spaces and bedrooms need furniture anchors and outlet covers.
When should I start baby proofing?
Begin before your child starts crawling, ideally around 6 months. Many hazards become reachable between 9 and 18 months, so having the highest-priority items in place by then is a good goal.
Is professional help necessary?
It is not required, but it can help if your home has unusual layouts or you want a thorough audit. For medical or safety-specific concerns, consult your pediatrician or a qualified safety professional.
Conclusion
How much baby proofing is necessary comes down to your child’s stage, the hazards in your home, and the rooms they use most. Start with stairs, furniture, cabinets with chemicals, and water. Then recheck regularly as your child grows and gains new skills.
Related reading
- History of Baby Proofing: How Childproofing Evolved and What It Means Today
- Free Baby Proofing Kit 2026: What to Expect and How to Use One
- Baby Proofing Service Atlanta: How to Choose the Right Pro (Steps and Checklist)
- Baby Proofing Company St. Louis: How to Choose One (6 Factors)
Ready to choose one?
About Graham Fisher
Graham Fisher is part of our editorial team and reviews and edits our childproofing guides, checking product details against manufacturer specifications and owner feedback.