 By Graham Fisher
Updated November 2026
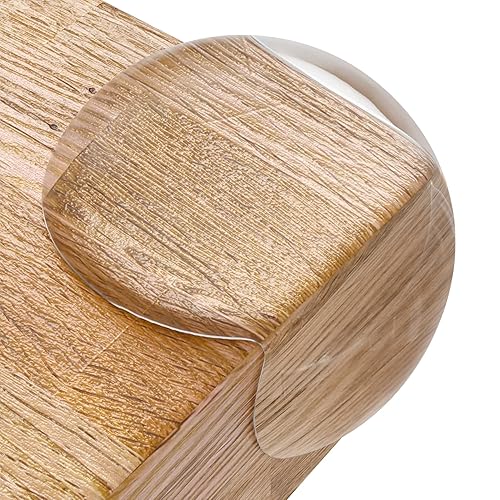
Roving cove baby proofing edge corner guards are a practical way to soften the sharp, rounded-off corners that tables, cabinets and hearths leave at toddler head height. This guide walks you through choosing the right profile, measuring, cleaning and installing them so they stay put. You will also learn how to check the work and when a different solution makes more sense.
Understand What Roving Cove Edge Guards Protect Against
Most toddler bumps happen at about 2 to 3 feet off the floor, which is exactly where table edges and cabinet corners sit. A rounded guard spreads the force of a fall over a wider, softer surface instead of a hard point. Think of it as padding for the spots your child is most likely to hit while running, climbing or standing up too fast.
Shopping for one? See our guide: 6 Best Baby Proofing Edge Protectors for Toddler Homes (2026).
Guards do not replace supervision, and they will not stop a child from falling against a sharp object that is not covered. Their job is to reduce injury when contact happens anyway.
Choose the Right Size and Profile
Measure each corner before you buy. Check the length of the edge you need to cover, the thickness of the surface and whether the corner is square or rounded. Guards are often sold in a range of lengths, so you can cut or combine pieces to fit.
- Measure the exact edge length in inches, then add about half an inch of overlap at each end.
- Note the surface thickness so you can match the guard’s adhesive or clip style.
- Check whether the corner is a 90-degree angle or a curved profile, since not every guard bends to fit.
- Confirm the surface is smooth, flat and dry where the guard will attach.
Prepare the Surface and Install Each Guard
Adhesion fails most often because of dust, grease or moisture. Clean each contact area with rubbing alcohol, let it dry fully, then press the guard firmly along the edge. Hold pressure for the time the adhesive manufacturer specifies, which is commonly around 30 seconds to a minute.
- Clean the surface with rubbing alcohol and let it air-dry for several minutes.
- Dry-fit the guard and mark cut lines with painter’s tape.
- Trim the guard with a fine-tooth saw or sharp utility knife, then sand the cut end smooth.
- Peel the backing, align the guard with your marks and press from the center outward.
- Press firmly along the full length and at the ends.
- Wait the full cure time before letting your child near the area.
Check Adhesion After 24 Hours
Give the adhesive a day to set, then gently tug each end. A properly bonded guard should not lift or shift. If one end pulls up, remove it, clean the surface again and reapply rather than adding more tape.
Compare Your Options for Hard-to-Mount Corners
Not every surface takes adhesive well. Painted drywall, textured finishes and some glass tables may need a different approach. The table below summarizes common situations.
| Surface | Best approach | Watch for |
|---|---|---|
| Smooth laminate or wood | Adhesive guard | Dust and grease reduce hold |
| Textured or porous wall | Mechanical clip or no-adhesive option | Adhesive may not bond |
| Glass table | Clear, purpose-made glass guard | Residue can cloud the glass |
| Cabinet with frequent opening | Low-profile guard with firm bond | Peeling from repeated friction |
For wall corners in particular, a no-adhesive design can be a better fit. See Baby Proofing Corner Guards No Adhesive: 6 Safe Options That Stay Put for alternatives that avoid residue on painted surfaces.
Common Mistakes to Avoid
- Skipping the alcohol cleaning step, which is the most common cause of guards falling off.
- Installing in cold or humid rooms where adhesives cure slowly or poorly.
- Leaving gaps at the ends, which can catch small fingers.
- Using a guard that is too short, leaving an exposed sharp tip beyond it.
- Forgetting the lower edges of coffee tables and ottomans, which are at a child’s eye level.
For a wider look at what to cover in a room, Baby Proofing Corners and Edges: A Step-by-Step Guide for Toddler Homes goes through the full room-by-room pass.
Recommended gear
A few basic supplies make installation cleaner and more reliable.
- Rubbing alcohol helps remove residue so adhesive can bond properly. View on Amazon
- Painter’s tape lets you mark cut lines and hold guards in place while the adhesive sets. View on Amazon
- A fine-tooth hand saw gives clean, controlled cuts on foam and rubber edge guards. View on Amazon
FAQ
Do roving cove edge guards damage furniture finishes?
Some adhesives can leave residue or lift finish on delicate surfaces, so test a small hidden area first. Manufacturers often specify removal methods, and warm water with a mild soap is typically gentler than harsh solvents.
How long do edge guards last?
Lifespan depends on the material, the surface and how often the guard is handled or cleaned. Check every few weeks and replace any piece that lifts, cracks or collects grime.
Can I use edge guards on a glass table?
Yes, but use a guard designed for glass and follow the manufacturer’s surface instructions. Standard adhesive guards may leave cloudy residue that is hard to remove.
Conclusion
Good installation comes down to measuring carefully, cleaning the surface and giving the adhesive time to cure. Check every guard after a day, then inspect the whole room again in a few weeks. For any injury concern, contact your pediatrician or a qualified childproofing professional.
Related reading
- Baby Proofing Round Table: Corner Guards and Edge Safety Steps (2026)
- Baby Proofing Edge Corner Guards: 6 Steps to Soften Toddler Hazards
- Foam for Baby Proofing: A Step-by-Step Guide to Safer Corners and Edges
- DIY Baby Proofing Sharp Corners: 6 Steps to Soften Every Edge
Ready to choose one?
About Graham Fisher
Graham Fisher is part of our editorial team and reviews and edits our childproofing guides, checking product details against manufacturer specifications and owner feedback.