 By Graham Fisher
Updated November 2026
Bubble wrap baby proofing is a quick, low-cost way to pad hard surfaces, but it works best as a short-term barrier and not as a permanent safety fix. This guide shows you where bubble wrap can help, how to apply it so it stays put, and when to choose a sturdier solution instead. Use it to soften a few known hazards while you plan the rest of your childproofing.
Where Bubble Wrap Makes Sense
Bubble wrap is best for surfaces a toddler might bump during a fall or a fast run, such as the edge of a coffee table, a hearth ledge or the frame of a glass-front cabinet. It is not designed to protect against climbing, pulling or heavy impact. Treat it as cushioning, not as a barrier.
Shopping for one? See our guide: Baby Proofing Service Houston: 7 Best Options Compared (2026).
Before you start, decide whether the surface is a bump risk or a grab risk. If your child will pull on it, bubble wrap is the wrong tool. For sharp corners, DIY Baby Proofing Sharp Corners: 6 Steps to Soften Every Edge covers more durable options.
Step-by-Step Application
Clean the surface with a dry cloth first. Dust and grease keep adhesive from grabbing, and tape will peel off within hours if the surface is not clean.
- Measure the surface and cut the wrap about 1 inch longer on each side than the area you need to cover.
- Choose the larger bubbles (3/8 inch or more) for better cushioning on edges.
- Wrap the bubble side toward the surface, so the flat plastic faces outward and the bubbles absorb impact.
- Secure the edges with painter’s tape or removable double-sided tape. Avoid strong packing tape on painted or finished wood.
- Press the wrap flat with your palm, working from the center outward, to remove trapped air pockets.
- Check the wrap every few days. Replace any section that has torn, shifted or peeled.
Checking the Wrap Over Time
Bubble wrap breaks down with heat, sunlight and repeated handling. Near a fireplace, radiator or sunny window, expect to replace it more often. Check that the tape has not lifted, that bubbles have not popped and that the wrap is not peeling away from a corner where a small hand could grab it. A popped section is a loose plastic edge, and loose plastic is a choking and suffocation concern for young children.
Common Mistakes
- Using bubble wrap on furniture that tips. Wrap adds no stability, so anchor the piece separately.
- Covering outlets, cords or heaters with wrap. Heat can build up and cords can be pulled.
- Leaving torn or popped pieces in place. A loose sheet is a hazard in itself.
- Relying on wrap for stairs or windows, where falls can cause serious injury.
- Using strong adhesive on delicate finishes, which can strip paint or veneer when removed.
Recommended Gear
Painter’s tape releases cleanly from most painted walls and furniture, which makes it a practical choice for temporary wrap. View on Amazon
Large-bubble wrap gives more cushioning on edges than small bubbles and is easier to cut to length. View on Amazon
Removable double-sided mounting tape holds wrap in place without leaving much residue behind. View on Amazon
FAQ
Is bubble wrap safe to use for baby proofing?
It can be used on low-risk bump surfaces if it stays firmly attached and free of torn or loose plastic. Check it regularly, and remove it if any section starts to peel or pop. Consult your pediatrician if you have questions about a specific hazard.
How long does bubble wrap last on furniture corners?
Lifespan depends on heat, sunlight and how often the area is touched, so check it weekly. Many households replace it every few weeks in high-traffic spots.
What should I use instead of bubble wrap for sharp corners?
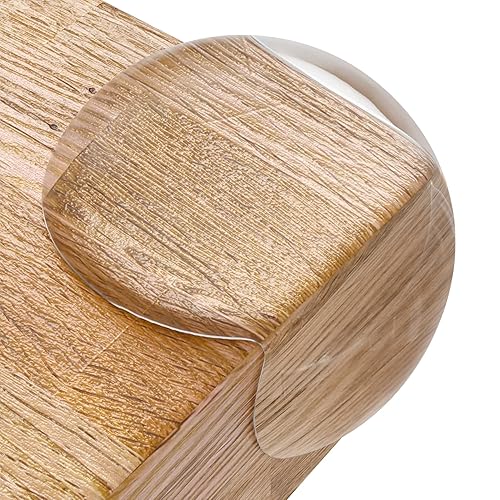
Purpose-made corner guards are firmer and more durable than wrap and hold up better to repeated bumps. Use wrap only as a temporary measure while you source a better option.
Conclusion
Bubble wrap can soften a few bump-prone spots while you finish childproofing, but it should never replace anchors, locks or gates. Apply it with clean surfaces and removable tape, inspect it often and replace it at the first sign of wear. For a complete plan, work through each room with a checklist and address the hazards that matter most for your child’s age and mobility.
Related reading
- Where to Buy Furniture Anchors: 5 Best Picks for Baby Proofing (2026)
- Viking Stove Baby Proofing Review: Features and Performance
- Stove Guard Baby Proofing: A Step-by-Step Guide for Safer Kitchens
Ready to choose one?
About Graham Fisher
Graham Fisher is part of our editorial team and reviews and edits our childproofing guides, checking product details against manufacturer specifications and owner feedback.