 By Ethan Brooks
Updated November 2026
DIY baby proofing cabinets is one of the most effective weekend projects you can take on before a toddler starts pulling at everything in reach. In this guide, you’ll audit your cabinets, choose the right lock type for each door, and install them correctly so cleaning products, knives, and small objects stay out of reach. Most of the work takes an hour or two per room.
Audit Your Cabinets Before You Buy Anything
Start by opening every cabinet and drawer in the kitchen, bathroom, and laundry area. Note which ones hold hazards such as cleaners, medications, sharp tools, batteries, and small items that could be choking risks. Then check how each door opens. Push-to-open doors, flush handles, and cabinets with knobs need different hardware than standard pull-handle doors.
Shopping for one? See our guide: 5 Best Buy Buy Baby Child Proofing Products for Cabinets and Drawers (2026).
Measure the thickness of each door and the depth of the inner panel. Many magnetic and adhesive locks require a clear flat surface of a specific size, so measuring now prevents returns later.
Choose the Right Lock for Each Cabinet Type
Different cabinets call for different solutions. Use this rough guide:
- Side-by-side door pairs: A strap lock or a pair of flexible cabinet locks works well because it secures both doors at once.
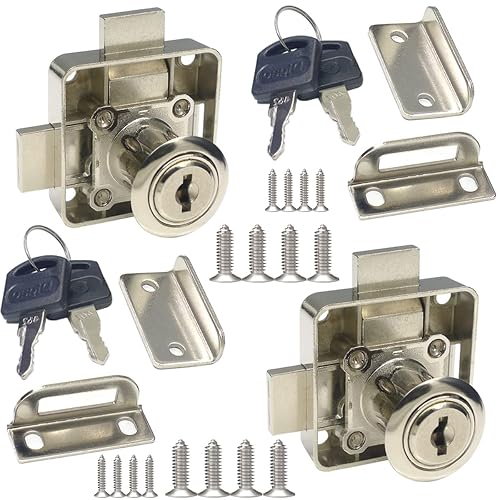
- Cabinets with recessed handles: Choose a hook-and-catch lock or a magnetic lock that mounts inside the frame.
- Lower drawers that pull all the way out: A drawer lock with a sliding bar keeps the drawer from opening fully.
- Glass-front cabinets: Use a small clip or latch that keeps the glass shut without adhesive residue on the glass.
For a broader view of drawer-specific options, see Drawer Locks Baby Proofing: 6 Steps to Secure Every Drawer.
Install Locks in the Right Order
Step 1: Clean and Dry the Surfaces
Wipe each cabinet frame and door edge with rubbing alcohol. Let the surface dry fully. Adhesive backing will not hold on grease, dust, or cleaning residue, and most failures come from skipping this step.
Step 2: Test the Fit With Doors Closed
Close the door and check that the lock sits flush and does not rub the frame. Make sure the catch engages without forcing the door.
Step 3: Mount the Catch and Strike Plate
Position the catch on the door and the strike plate on the frame, then press firmly for the time the adhesive instructions specify, usually around 30 seconds. Many manufacturers recommend waiting 24 hours before heavy use, so plan accordingly.
Step 4: Test Under Real Conditions
Open and close the door several times, then pull firmly from the outside. A child pulls differently than an adult, so test with a sharp tug, not a gentle push.
Checklist for Every Cabinet Lock Install
- Inventory every cabinet and drawer that holds hazards.
- Measure door thickness, frame depth, and handle style.
- Clean all mounting surfaces with rubbing alcohol and let them dry.
- Dry-fit each lock before removing any adhesive backing.
- Press the adhesive for the full time the packaging specifies.
- Wait for the recommended cure time before testing.
- Test each lock with a firm pull from the outside.
- Recheck every lock after a month, since adhesive can loosen in humid kitchens.
Recommended Gear
- Adjustable strap cabinet locks: Useful for paired doors because one strap can secure both handles. View on Amazon
- Magnetic cabinet lock kit with key: Works well on flush doors where a visible latch would look out of place. View on Amazon
- Drawer lock with sliding bar: Holds deeper drawers in place and keeps them from pulling out. View on Amazon
Common Mistakes to Avoid
- Skipping the surface cleaning step, which causes most adhesive failures.
- Installing a lock that is too short for the door, so it loosens over time.
- Leaving magnetic locks where a toddler can find and pull off the magnetic key.
- Assuming a lock that works on one cabinet will work on every cabinet in the house.
- Forgetting the lower cabinets under the sink, which often hold the most hazardous products.
FAQ
Do adhesive cabinet locks damage painted wood?
They can pull paint off if removed carelessly, so warm the adhesive with a hair dryer before peeling. Test on an inside edge first if the finish is new.
How often should I check cabinet locks?
Check them monthly, and after any cleaning or humid season, since adhesive can weaken. Replace any lock that feels loose or no longer engages fully.
Can I baby proof cabinets in a rental?
Yes, but choose non-screw options such as adhesive or pressure-mounted locks, and confirm with your landlord first. For more guidance on rentals, see Baby Proofing in a Rental: A Step-by-Step Guide for Safer Toddler Homes.
Conclusion
DIY baby proofing cabinets comes down to a clear audit, the right lock for each door type, and careful installation. Test every lock with a firm pull and recheck them regularly. For a full home plan, consider working through Safety Proofing Home for Baby Checklist: 12 Room-by-Room Steps next. Always consult a childproofing professional if you have unusual cabinet hardware or a concern about installation.
Related reading
Ready to choose one?
About Ethan Brooks
Ethan Brooks is part of our editorial team and reviews and edits our childproofing guides, checking product details against manufacturer specifications and owner feedback.