 By Graham Fisher
Updated November 2026
Baby proofing without damaging your home is possible if you choose removable, non-drilling products and place them with care. This guide walks you through assessing your space, picking damage-free hardware, and installing it so it holds firmly without leaving marks, holes, or residue. Most of the job takes less than an afternoon.
Start With a Damage-Free Hazard Check
Walk through each room at toddler height, roughly 24 to 36 inches off the floor, and note what a child could reach, climb, or pull. Pay attention to cords, cabinet doors, stair openings, and anything tall enough to tip. Knowing exactly where the risks are lets you use fewer products in the right places rather than covering every surface.
Shopping for one? See our guide: Baby Proofing Service Houston: 7 Best Options Compared (2026).
If you rent, check your lease before you start. Many landlords allow removable solutions but prohibit screws in walls or tile. For a rental-specific approach, see Baby Proofing in a Rental: A Step-by-Step Guide for Safer Toddler Homes.
Choose Removable Methods for Each Hazard
Match the method to the surface. Pressure-mounted gates fit between door frames without drilling, while adhesive-backed hooks and magnetic locks suit cabinets and drawers. Tension rods and freestanding fixtures can replace wall-mounted items on many furniture pieces.
Furniture and Tip-Over Risks
Heavy dressers, bookcases, and TV stands are among the most serious tip-over hazards. Freestanding options exist, but if you need a wall connection, use anchors that can be removed later. Some anchor systems use low-profile adhesive or fabric straps. For options, see Where to Buy Furniture Anchors: 5 Best Picks for Baby Proofing (2026) and Baby Proofing TV Stand: Step-by-Step Guide to Anchoring and Safer Setup.
Corners and Edges
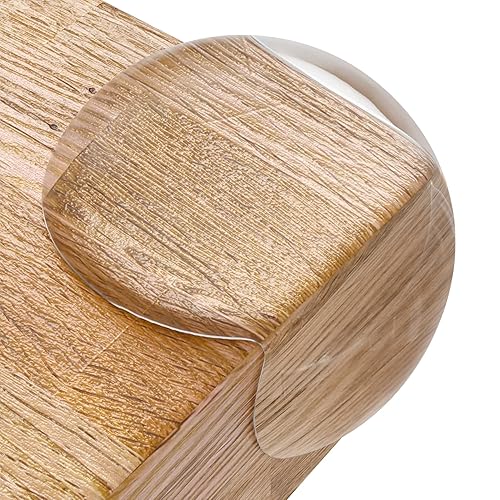
Sharp table corners can be softened with removable silicone or foam guards. Measure the depth and width of each edge before buying so the guard seats fully. Consider Corner Protectors Baby Proofing Review: Pros and Cons to compare designs.
Install Without Leaving Marks
Clean the surface with rubbing alcohol and let it dry before applying any adhesive. Press firmly for the time the manufacturer specifies, usually 30 to 60 seconds, then wait the recommended cure period before loading the item. Test each device by pulling gently in the direction a child would pull.
- Clean and dry the mounting surface completely.
- Test a small hidden area first, such as the back of a cabinet or underside of a drawer.
- Apply the product according to the instructions, pressing firmly.
- Allow the full cure time before use.
- Check the hold weekly, especially on textured or painted surfaces.
For rooms where you need several layers of protection, a room-by-room plan helps you avoid overlap. See Full House Baby Proofing: A Room-by-Room Step-by-Step Guide (2026).
Handle Doors, Drawers, and Outlets
Cabinet and drawer locks usually work without tools. Choose ones that attach to the inside of the cabinet so they stay out of sight. For doors, sliding locks and door stops can often be installed on the frame rather than the door face. If you use plug covers, select ones that fit snugly without hardware.
Ordering a complete set of supplies in one trip saves time. Essential Baby Proofing Items: 12 Must-Haves for Every Toddler Home (2026) lists the core products most families start with.
Recommended gear
- 3M Command Hooks help you hang cords, bags, and cabinet accessories on painted walls, and they remove cleanly when you follow the release tab instructions. View on Amazon
- Safety 1st Magnetic Cabinet Lock Set gives you tool-free cabinet security that leaves no screw holes inside the cabinet. View on Amazon
- Safety 1st Pressure-Mounted Gate fits between door frames without drilling, which suits rentals and most doorways. View on Amazon
Common Mistakes
- Using strong adhesive on freshly painted walls, which can peel paint on removal.
- Skipping the surface cleaning step, which reduces hold strength.
- Relying on a pressure gate at the top of stairs, where manufacturers typically specify hardware-mounted gates instead.
- Forgetting to re-check removable products after a few weeks, since adhesives can loosen with heat or humidity.
- Assuming a product is child-safe without checking its age and weight ratings.
FAQ
Can I baby proof without any drilling at all?
Yes, for most rooms. Pressure-mounted gates, adhesive hooks, magnetic cabinet locks, and corner guards cover many hazards. Heavy furniture, however, often needs a wall anchor, and some manufacturers only approve that connection with hardware.
How do I remove adhesive products without damaging paint?
Follow the release instructions on the package, usually pulling slowly along the tab or stretching the strip parallel to the wall. Gentle warming with a hair dryer can soften the adhesive if needed.
Are removable products as safe as installed ones?
They can be, when used within their rated weight and for the right surface. Check the manufacturer’s instructions, and consult a pediatric safety professional or your child’s doctor if you have questions about a specific hazard.
Conclusion
Baby proofing without damage comes down to choosing the right removable method for each hazard and installing it carefully. Start with a room-by-room check, prioritize tip-over and cord risks, and test every device before relying on it. Recheck hold strength regularly so your home stays both safe and intact.
Ready to choose one?
About Graham Fisher
Graham Fisher is part of our editorial team and reviews and edits our childproofing guides, checking product details against manufacturer specifications and owner feedback.