 By Graham Fisher
Updated November 2026
Baby proofing tips and tricks come down to one goal: removing or blocking the things a crawling or walking toddler can reach, pull, climb or swallow. This guide walks you through a practical order of operations, the hardware that does most of the work, and the mistakes that leave gaps even in well-proofed homes. Start with the highest-risk areas and work outward.
Start With a Floor-Level Walkthrough
Get down on your hands and knees and look at each room from a toddler’s height, roughly 24 to 36 inches off the floor. You will spot cords, small objects, cabinet pulls and sharp table edges that you would never notice standing up. Before buying anything, make a quick list of what you see. Our Safety Proofing Home for Baby Checklist: 12 Room-by-Room Steps can help you organize that list by room.
Shopping for one? See our guide: Baby Proofing Service Houston: 7 Best Options Compared (2026).
Secure the Highest-Risk Hazards First
Some hazards cause far more serious injuries than others. Prioritize these before anything cosmetic:
- Stairs: install hardware-mounted gates at the top of stairs. Pressure-mounted gates are fine for doorways but should not be used at the top of a staircase.
- Furniture and TVs: anchor dressers, bookcases and TVs to the wall with anti-tip brackets or straps.
- Water: use a toilet lock and keep bathroom doors closed. Even a few inches of water can be dangerous.
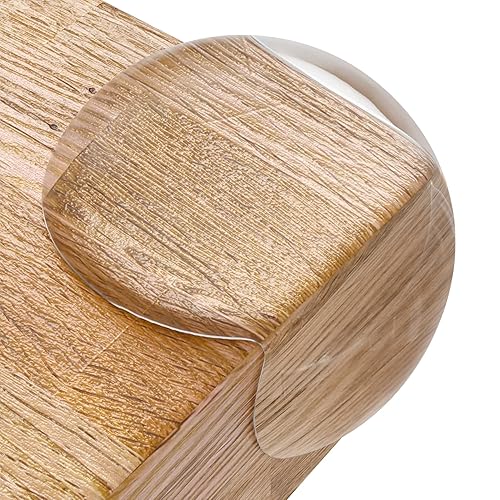
- Heat and sharp edges: add stove knob covers and corner guards where a child could fall against a table or counter.
Lock Cabinets, Drawers and Outlets
Cabinets under sinks and in kitchens often hold cleaners, medications and knives. Use magnetic or strap-style locks on lower cabinets and drawers, and check that the lock engages fully before you walk away. For wall outlets, use sliding or twist-resistant plug covers. Replace any cover that a child can pull out with a fingernail. Guidance on fitting these covers is in Plug Covers Baby Proofing: A Step-by-Step Guide for Every Room.
Tips for Cabinet Locks
Mount locks at the top of the door or drawer where possible, and remember that adhesive-backed locks can fail on painted or textured surfaces. Our article Hacks for Baby Proofing Cabinets: 7 Practical Tricks That Work (2026) covers the fit issues people run into most often.
Tackle Sharp Corners and Tip-Over Risks
Corner guards and edge bumpers reduce the impact of falls against coffee tables and fireplace hearths. Anchor any tall, top-heavy furniture, and place heavy items on lower shelves. For end tables and similar pieces, the steps in End Table Baby Proofing: 6 Steps to Secure Sharp Corners and Tip-Overs are worth following in order.
Supplies Checklist
- Hardware-mounted safety gates (top of stairs)
- Pressure-mounted gates (doorways only)
- Furniture anchor kit and wall studs finder
- Cabinet and drawer locks
- Outlet covers
- Corner and edge guards
- Toilet lock and stove knob covers
Common Mistakes
- Using pressure-mounted gates at the top of stairs.
- Anchoring furniture into drywall without a stud or proper anchor.
- Assuming a lock is secure without testing it from a child’s point of view.
- Forgetting that grandparents’ or visitors’ homes need proofing too.
- Re-checking hardware only once. Screws and adhesive loosen over time.
Recommended Gear
- Hardware-mounted gate: the right choice for stairways, since it does not rely on wall pressure. View on Amazon
- Furniture anchor kit: straps or brackets that secure dressers and bookcases to studs. View on Amazon
- Magnetic cabinet locks: invisible on the outside and easy for adults to open. View on Amazon
FAQ
Where should I start baby proofing?
Start with stairs, furniture anchoring and water hazards, since these cause the most serious injuries. Then move to cabinets, outlets and sharp edges.
Are pressure-mounted gates safe for stairs?
Manufacturers generally advise against using pressure-mounted gates at the top of stairs, because a child who pushes against them can dislodge them. Use a hardware-mounted gate there instead.
How often should I recheck my baby proofing?
Check hardware and locks monthly, and re-walk your home every few months as your child grows and gains new skills like climbing or opening doors.
Conclusion
Effective baby proofing starts with a floor-level look at each room, then focuses on the highest-risk hazards before cosmetic fixes. Test every lock and anchor regularly, since children change quickly. If you have questions about a specific hazard, consult your pediatrician or a certified childproofing professional.
Ready to choose one?
About Graham Fisher
Graham Fisher is part of our editorial team and reviews and edits our childproofing guides, checking product details against manufacturer specifications and owner feedback.