 By Graham Fisher
Updated November 2026
Baby proofing ideas on a budget start with one principle: fix the hazards that cause the most serious injuries first, then add hardware gradually. You do not need to buy a full kit on day one. Focus on anchoring heavy furniture, blocking access to water and medicine, and covering electrical outlets, and you will cover most of the real risk for a few dollars per room.
Start With a Free Hazard Walk-Through
Before buying anything, crawl through each room at toddler height. Look for things a child can reach, climb, pull or pour. Items at eye level for a standing 2-year-old, cords hanging from counters, and anything on a low shelf deserve attention first. This walk-through costs nothing and tells you exactly what to buy, which prevents wasted money on gear you do not need.
Shopping for one? See our guide: Baby Proofing Service Houston: 7 Best Options Compared (2026).
Prioritize the Highest-Risk Items
Spend your first dollars where injuries are most severe. Tip-over hazards from dressers, bookcases and TVs are a leading cause of serious furniture injuries in young children, so anchoring those pieces comes first. For practical options, see Where to Buy Furniture Anchors: 5 Best Picks for Baby Proofing (2026) and Baby Proofing TV Stand: Step-by-Step Guide to Anchoring and Safer Setup. Medicines, cleaning products and button batteries also belong at the top of the list. Store them up high in a locked cabinet or on a shelf the child cannot reach.
Low-Cost Fixes Room by Room
Most of the cheapest protection comes from a handful of repeatable steps:
- Kitchen: Use a basic cabinet latch on cleaning-product cabinets and move knives and hot mugs out of reach. For the range, see Stove Guard Baby Proofing: A Step-by-Step Guide for Safer Kitchens.
- Bathroom: Set your water heater to 120°F or lower, which manufacturers commonly specify as a scald-prevention setting. Keep the toilet lid closed and use a lock. A closer look at faucets is in Bathtub Faucet Baby Proofing: A Step-by-Step Guide for Toddler Bathrooms.
- Living room: Tuck cords behind furniture and move lamps out of reach. Baby Proofing Table Lamps: A Step-by-Step Guide for Safer Living Rooms covers this in detail.
- Electrical: Cover unused outlets with inexpensive plastic covers. Covers that are harder to pull out are safer than the cheapest versions. See Plug Covers Baby Proofing: A Step-by-Step Guide for Every Room.
Use Household Items Before Buying Gear
Many hazards can be handled with what you already own. Rubber bands or a tension rod can keep a drawer partly closed in a pinch, though a purpose-made lock is more reliable. Pool noodles or foam tubing can cover table edges, and a few layers of duct tape or a folded towel can soften a fireplace hearth. These are temporary fixes, so check them weekly for wear and replace them when they loosen.
Checklist for a Starter Kit
- Furniture anchors for dressers, bookcases and TVs
- Outlet covers for every unused receptacle
- Cabinet latches for cleaning products and knives
- Drawer locks for the lowest drawers
- A gate for stairs and a door to the kitchen or garage
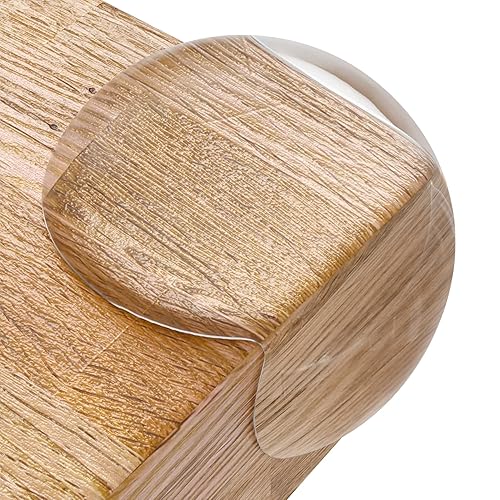
- Corner guards for the sharpest table and counter edges
Common Mistakes
- Buying gates and corner guards before anchoring furniture, which leaves the most dangerous hazard unaddressed.
- Relying on cheap plastic latches that a determined toddler can open.
- Assuming a gate is safe at the top of the stairs. Pressure-mounted gates are not designed for stairs in many home setups.
- Forgetting that a child can climb to reach things. Move items well beyond the reach of a child standing on a chair.
- Letting a home rest after a single pass. Children change quickly, so repeat the walk-through every few months.
Recommended Gear
- Furniture anchor kit: Anchors that fasten dressers and bookcases to the wall are the single most important purchase for most families. View on Amazon
- Adhesive cabinet latches: These are easy to install without drilling and work well on cleaning-product cabinets. View on Amazon
- Outlet covers: Sliding or tamper-resistant covers stop a child from pulling out the plug. View on Amazon
FAQ
What is the cheapest baby proofing item that matters most?
Furniture anchors are usually the most important low-cost purchase because tip-overs cause serious injuries. A basic kit covers several dressers or bookcases.
Can I baby proof without buying a full kit?
Yes. Prioritize anchors, cabinet latches for medicines and cleaners, and outlet covers, then add other items as your child grows. Consult a pediatrician or a home safety professional if you have specific concerns.
How often should I check my baby proofing?
Check every few months and after any big developmental change, such as walking or climbing. Replace worn latches and covers as needed.
Conclusion
Baby proofing ideas on a budget work best when you target the biggest hazards first. Walk through each room, anchor heavy furniture, lock away medicines and cleaners, and cover outlets. Add gates, corner guards and other gear as your budget allows and your child’s abilities change.
Ready to choose one?
About Graham Fisher
Graham Fisher is part of our editorial team and reviews and edits our childproofing guides, checking product details against manufacturer specifications and owner feedback.