 By Graham Fisher
Updated November 2026
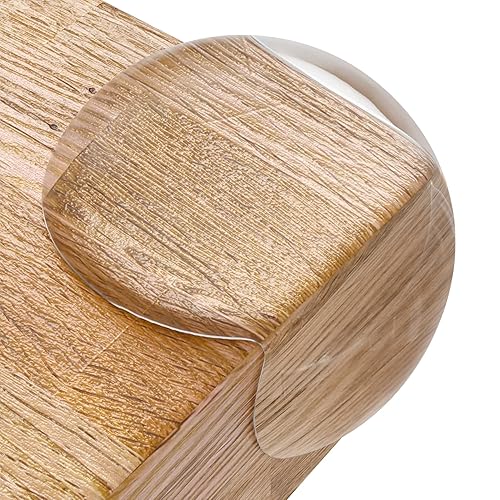
Baby proofing edge guards are soft, padded strips or caps that fit over sharp corners on tables, counters, hearths and other furniture. Installed correctly, they reduce the chance of a bump to the head or face when a toddler is walking, climbing or running through a room. This guide walks through how to measure, choose and fit them so they stay put.
Step 1: Find Every Hazard Before You Buy
Walk through each room at toddler height, roughly 24 to 36 inches from the floor, and note every edge a child could hit. Coffee tables, end tables, kitchen islands, TV stands and fireplace hearths are the usual culprits. Check for sharp corners on cabinet doors and drawer fronts as well. Make a list so you can measure once and buy the right amount.
Shopping for one? See our guide: 6 Best Baby Proofing Edge Protectors for Toddler Homes (2026).
Step 2: Measure Each Edge Accurately
Measure the length of each edge in inches, then add a small margin so the guard reaches fully around the corner. Note the thickness of the furniture top, because many guards are sold for specific edge thicknesses. For round furniture, measure the circumference with a flexible tape, since round edge guards are usually sold as a continuous strip or in sections.
Step 3: Choose the Right Type of Guard
Most edge guards fall into two groups: adhesive-backed foam strips and corner caps or bumpers that friction-fit or attach with screws. Adhesive foam is quick and works well on smooth, clean surfaces. Screw-on or clip-on guards suit heavy use, rough finishes or furniture you move often. Look for guards labeled as meeting a recognized safety standard, and check the manufacturer’s stated temperature and surface compatibility.
Step 4: Install the Guards Correctly
- Clean the surface with rubbing alcohol or a degreasing cleaner and let it dry completely.
- Dry-fit each guard first to confirm the length and corner fit.
- Peel the adhesive backing and press firmly along the edge, starting at the middle and working outward.
- Hold pressure for the time the manufacturer specifies, often around 30 to 60 seconds.
- Wait the full cure time before letting your child touch the guard.
Step 5: Check Fit and Wear Every Week
Run your hand along each guard weekly. Lift any loose end, and reseat or replace it if the adhesive has failed. Look for cracks, tears or flattened foam that no longer cushions. Heat from a fireplace or a sunny window can soften adhesive, so inspect those spots more often.
Step 6: Plan for Furniture You Cannot Cover
Some edges, such as a glass tabletop or a decorative trim you want to keep visible, may not suit a guard. In those cases, consider rearranging furniture away from walking paths or using a gate to block the area. For glass or fireplace hazards, a physical barrier often does more than padding. A pediatric safety specialist or your child’s doctor can advise if you are unsure which approach fits your home.
Checklist for Edge Guard Installation
- Tape measure and notepad for edge lengths
- Rubbing alcohol and clean cloths
- Guards matched to your edge thickness
- Screwdriver if using screw-on guards
- Weekly inspection reminder on your calendar
Common Mistakes
- Skipping the cleaning step, which lets adhesive fail within days.
- Buying by estimate instead of measuring each edge.
- Applying guards to dusty or oily surfaces.
- Ignoring loose ends that a child can pull off.
- Assuming guards replace supervision or other barriers.
Recommended Gear
- Corner guard strips: A continuous padded strip gives a clean look along long table edges. View on Amazon
- Adhesive foam edge protectors: Easy to cut to length for straight edges and small furniture. View on Amazon
- Screw-on corner bumpers: Better for heavy furniture or surfaces where adhesive will not hold. View on Amazon
For more on softening specific pieces, see Baby Proofing Corners and Edges: A Step-by-Step Guide for Toddler Homes and Baby Proofing Table Edges: 6 Steps to Protect Toddlers From Sharp Corners.
FAQ
Do edge guards need adhesive to work?
No. Adhesive-free options such as friction-fit caps or screw-on bumpers work well, especially on surfaces where adhesive may leave residue or fail.
How long do baby proofing edge guards last?
Lifespan depends on the material, wear and cleaning. Inspect them weekly and replace any that are cracked, torn or no longer staying attached.
Are edge guards enough to protect a toddler?
They reduce the force of bumps but do not prevent every injury. Combine them with gates, anchors and supervision, and ask your pediatrician for guidance on your child’s specific risks.
Conclusion
Measuring each edge, choosing the right guard type and installing it on a clean surface will give you a solid start. Check the guards every week and replace any that loosen. For the highest-risk spots, pair padding with a physical barrier or a change in furniture placement.
Related reading
- Baby Proofing Round Table: Corner Guards and Edge Safety Steps (2026)
- Baby Proofing Edge Corner Guards: 6 Steps to Soften Toddler Hazards
- Stove Guard Baby Proofing: A Step-by-Step Guide for Safer Kitchens
- Round Coffee Table Baby Proofing: 6 Steps to Protect Toddlers From Edges
Ready to choose one?
About Graham Fisher
Graham Fisher is part of our editorial team and reviews and edits our childproofing guides, checking product details against manufacturer specifications and owner feedback.