 By Graham Fisher
Updated November 2026
Baby proofing corners and edges means padding or softening the sharp points on furniture, counters and fireplace hearths so a toddler who falls or bumps into them is less likely to get hurt. By the end of this guide, you will know which pieces to address first, how to measure and install protectors, and how to check that they stay put. Most of the work takes an afternoon.
Find the Corners and Edges That Need Protection
Start by walking through each room at toddler height. Crouch down, or better yet, crawl, and look at what a child would see when they stand up after a fall. Focus on anything with a hard corner between about 12 and 40 inches off the floor, since that is where a head or cheek is most likely to meet the edge. Coffee tables, end tables, TV stands, dressers, entertainment centers and kitchen islands usually top the list. Glass tables deserve special attention because their edges can chip or shatter, and a sharp broken edge is worse than a dull one.
Shopping for one? See our guide: 6 Best Baby Proofing Edge Protectors for Toddler Homes (2026).
Choose the Right Type of Protector
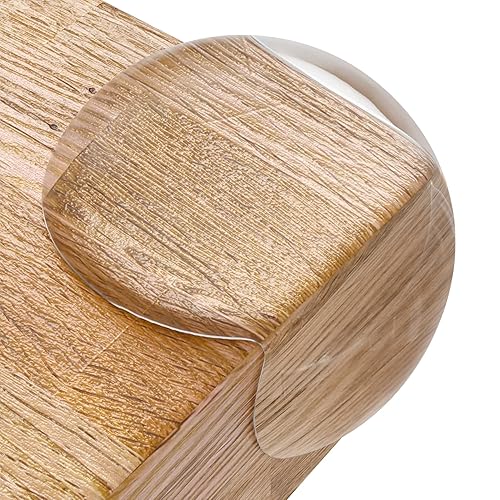
Corner and edge protectors come in several forms, and each suits different surfaces. Soft foam strips and corner caps work well on wood and laminate. Rubber or silicone guards grip better on glossy finishes. For glass, look for thick, clear bumpers rated for that material. Adhesive types are the most common, but some families prefer options that do not rely on tape, especially on painted or delicate finishes.
Before buying, measure the length of each edge and note the thickness of the tabletop. Most protectors are designed for a specific edge width, and a loose fit will peel off quickly. Keep in mind that a protector only softens an impact; it does not stop a child from climbing or pulling on furniture, so pair it with anchoring where tipping is possible.
Install Protectors Step by Step
Installation goes faster and holds longer when the surface is prepared properly.
- Clean each edge with rubbing alcohol or a degreaser to remove dust, oil and furniture polish.
- Let the surface dry completely, which usually takes a few minutes.
- Dry-fit the protector and mark both ends so you know the correct placement.
- Peel the backing and press the protector firmly from one end, working toward the other to avoid trapped air.
- Hold pressure for about 30 seconds along the full length, paying extra attention to the corners.
- Wait at least 24 hours before testing the bond, since many adhesives continue to set during that time.
Check Corners, Edges and Adhesion Over Time
Corners take the most stress, so check them first. Press gently on each protector and look for lifting, gaps or soft spots. Heat from sunlight, humidity and frequent cleaning can weaken adhesives over months, so plan a quick inspection every few weeks during the first year and monthly after that. Replace any protector that is cracked, torn or no longer sits flush. A damaged guard can crack under impact and leave small pieces that a toddler might pull off.
Watch for Hidden Hazards
Protectors can trap food, dust and moisture, especially on kitchen islands. Wipe them regularly and remove any that become gummy or discolored. Also check that a protector does not block a drawer, door or cabinet from opening fully.
Common Mistakes to Avoid
- Applying protectors to a dirty or oily surface, which causes them to fail within days.
- Covering only the front edge of a table and ignoring the corners, where most impacts happen.
- Choosing a protector that is too thin to absorb a real fall.
- Assuming adhesive will hold on painted or varnished wood without testing a small section first.
- Forgetting to recheck protectors after moving furniture or changing the room layout.
Recommended Gear
- Corner guard strips for furniture: Flexible foam or rubber strips that fit most tabletop edges and can be cut to length. View on Amazon
- Clear glass table edge bumpers: Thick, transparent protectors made for glass surfaces where a dark or bulky guard would look out of place. View on Amazon
- Isopropyl alcohol wipes: Useful for cleaning surfaces before adhesive protectors go on. View on Amazon
For a broader look at protecting rooms from floor to ceiling, see Safety Proofing Home for Baby Checklist: 12 Room-by-Room Steps. If your home has a round tabletop, Baby Proofing Round Table: Corner Guards and Edge Safety Steps (2026) covers the specific fit challenges. Families with a glass surface may also find Baby Proofing Glass Table: 7 Steps to Protect Toddlers From Sharp Edges (2026) useful. For bed frames, see Baby Proofing Bed Corners: A Step-by-Step Guide for Toddler Rooms.
FAQ
How high should corner protectors go?
Protect any hard edge that sits roughly between the floor and 40 inches high, since that is where a toddler’s head, face or body is most likely to strike. Check the top of the furniture as well if your child can reach it by climbing.
Do corner protectors work without adhesive?
Some do, using friction, clips or a snug wrap-around fit. They are useful on surfaces where tape could damage the finish, but they may need more frequent checks to make sure they have not shifted.
How often should I replace edge protectors?
Replace any protector that is cracked, torn, loose or visibly worn. Inspect them monthly, and replace them sooner if they show repeated lifting or discoloration.
Conclusion
Baby proofing corners and edges is a manageable project that makes a real difference in how injuries play out. Focus first on low, hard, high-traffic pieces, install protectors on clean dry surfaces, and recheck them regularly. For specific concerns about your child’s safety, consult your pediatrician or a certified childproofing professional.
Ready to choose one?
About Graham Fisher
Graham Fisher is part of our editorial team and reviews and edits our childproofing guides, checking product details against manufacturer specifications and owner feedback.