 By Graham Fisher
Updated November 2026
Non toxic baby proofing means securing your home against falls, burns and pinch points while avoiding products that release harmful chemicals into the air or onto surfaces your toddler touches. This guide walks you through checking your gear, choosing safer materials and fixing the most common gaps, so you finish with a home that is both physically safe and low in chemical exposure.
Start With a Materials Check
Before buying anything new, look at what is already in the home. Many toddler-related chemical concerns come from older furniture finishes, vinyl products and soft plastics that a child mouths or chews. Manufacturers typically label products with material information and compliance statements, so read the packaging and product pages before you buy.
Shopping for one? See our guide: Baby Proofing Service Houston: 7 Best Options Compared (2026).
Pay particular attention to items your child will chew on: teethers, bath toys, rubber door stops and the plastic edges of cabinet locks. Anything that goes in the mouth or gets chewed on regularly deserves a closer look. If a product’s material is unclear, consider replacing it with one made of solid wood, stainless steel or a plastic clearly labeled as free of the additives you are trying to avoid.
Choose Safer Materials for Each Device
Most baby proofing devices fall into a few categories, and each has a different risk profile. Use the list below as a starting point when shopping or swapping out existing items.
- Cabinet and drawer locks: Choose locks with metal or solid, unpainted hardware where possible. Avoid anything with a strong chemical odor when new, and let products air out before installing them in a closed space.
- Outlet covers: Solid, one-piece covers are easier to inspect and are less likely to crack or shed small pieces than thin, brittle designs.
- Baby gates: Wood and metal gates generally avoid the plastic concerns associated with some molded models. Check that any finish is clearly described as low-VOC or non-toxic.
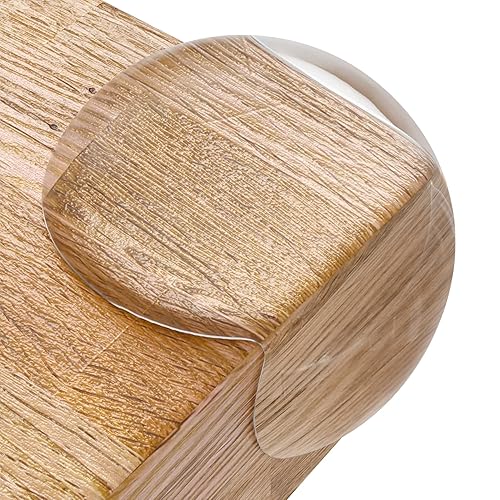
- Corner and edge guards: Look for firm, non-chewable materials. Soft foam guards can be chewed apart, so replace them if they show tears.
Ventilate and Clean After Installation
Even good products can leave a light residue or odor after installation. Open windows during and after mounting, and wipe installed items with a damp cloth to remove dust and manufacturing residue. Give new furniture and finished wood several days of ventilation before your child spends time in the room, especially in bedrooms and play areas.
Use gentle, fragrance-free cleaners on baby proofing devices. Harsh disinfectants can leave residues that your child may touch or mouth, so rinse surfaces well after cleaning.
Checklist: Non Toxic Baby Proofing Steps
- Inventory existing items and remove any that are cracked, peeling or chewed.
- Check labels for material information and compliance statements.
- Replace soft plastic teethable items with solid wood, metal or clearly labeled alternatives.
- Install new devices with the windows open and wipe all surfaces clean.
- Air out freshly finished furniture for several days before use.
- Recheck devices monthly for loose parts, cracks and new chew marks.
Common Mistakes to Avoid
- Assuming a product is safe because it is marketed as “natural” without reading the material details.
- Installing new furniture or finished wood directly into a nursery without ventilating first.
- Using strong cleaners on devices your child will mouth or touch.
- Ignoring small chew marks, which can lead to fragments your child could swallow.
- Skipping the physical safety checks while focusing only on chemicals. Falls and choking hazards still matter most.
Recommended Gear
Solid wood or metal cabinet locks are a practical choice for households looking to reduce plastic use, and they are widely sold in US stores. View on Amazon
Solid one-piece outlet covers are easier to inspect for cracks than thin multi-part designs. View on Amazon
Unfinished or low-VOC wood baby gates let you choose a finish you have researched, rather than accepting a default coating. View on Amazon
FAQ
Is non toxic baby proofing more expensive?
Not necessarily. Many households can start by replacing only the items their child chews on, which keeps the scope small. Focus first on the highest-contact products.
How do I know if a baby proofing product is non-toxic?
Check the product page and packaging for specific material names and compliance statements. If the information is vague or missing, contact the manufacturer and ask directly before you buy.
Should I still use baby proofing devices if I am unsure about materials?
Yes. Physical safety devices prevent serious injuries, so keep them in place while you research replacements. Consult your pediatrician with specific questions about chemical exposure.
Conclusion
Non toxic baby proofing comes down to checking materials, choosing solid and clearly labeled products, and ventilating after installation. Work through the checklist room by room, and keep physical safety in view while you reduce chemical exposure. For a full walkthrough of each room, see Safe Proofing Your Home for Baby: A Room-by-Room Guide (2026).
Related reading
- Young House Love Baby Proofing: A Room-by-Room Guide for Toddler Homes
- Where to Buy Furniture Anchors: 5 Best Picks for Baby Proofing (2026)
- Where to Buy Baby Proofing Supplies: Stores, Tips and What to Look For (2026)
- Viking Stove Baby Proofing Review: Features and Performance
- Stove Guard Baby Proofing: A Step-by-Step Guide for Safer Kitchens
- Sliding Door Locks for Baby Proofing: A Step-by-Step Guide (2026)
Ready to choose one?
About Graham Fisher
Graham Fisher is part of our editorial team and reviews and edits our childproofing guides, checking product details against manufacturer specifications and owner feedback.