 By Ethan Brooks
Updated November 2026
Red dot outlet covers are small, colored plastic or resin inserts that sit over a wall outlet and mark it visibly for adults, usually with a red circle or dot. They are not a substitute for a tamper-resistant outlet or a full childproofing plan, but they can help caregivers spot live outlets quickly and remind everyone to keep covers in place. This guide explains what red dot outlet covers do, how to choose and install them, and how to fit them into a room-by-room safety audit for toddlers.
What Red Dot Outlet Covers Actually Do
Most red dot outlet covers are simple plug-in or screw-in caps. The red dot is a visual cue, and the cover itself blocks the openings so a curious child cannot push a finger or object into the slots. Some versions add a sliding or hinged shutter, while others are solid caps that must be removed before the outlet can be used.
Shopping for one? See our guide: 7 Best Outlet Covers for Floor Installations Compared (2026).
It helps to be clear about the limits. A red dot marker does not make a receptacle safer on its own. Its value comes from two things: it blocks access to the slots, and it signals to adults which outlets are covered and which are open. Electrical codes in the United States have required tamper-resistant receptacles in most residential areas for years, and a cover is generally an add-on rather than a code-compliant replacement.
Step 1: Audit Your Outlets Before You Buy
Before ordering anything, walk each room and count the outlets within a toddler’s reach, which is roughly anything below 48 inches from the floor. Pay extra attention to outlets near the floor, behind furniture, and beside the bed or crib.
- Mark every outlet at a height of 5 feet or lower. Note whether it is a duplex (two sockets) or a single.
- Check the outlet type. Many newer outlets already have shutters built in, and those may not need a cover at all.
- Look for loose, cracked, or discolored faceplates. Replace these before adding any cover.
- Identify outlets that are used constantly, such as the one behind a couch or under a TV, since they will be the hardest to keep covered.
Step 2: Choose the Right Type of Cover
Red dot outlet covers come in several styles. The right one depends on the outlet and how often you plan to use it.
| Cover Type | Best For | Main Drawback |
|---|---|---|
| Solid plug-in caps | Outlets you rarely use | Must be removed to plug anything in |
| Sliding shutter caps | Frequently used outlets | Shutter can wear or stick over time |
| Screw-in faceplate covers | Permanent installations | Requires a screwdriver and some care |
| Self-adhesive dot stickers | Visual marking only | Adds no physical protection |
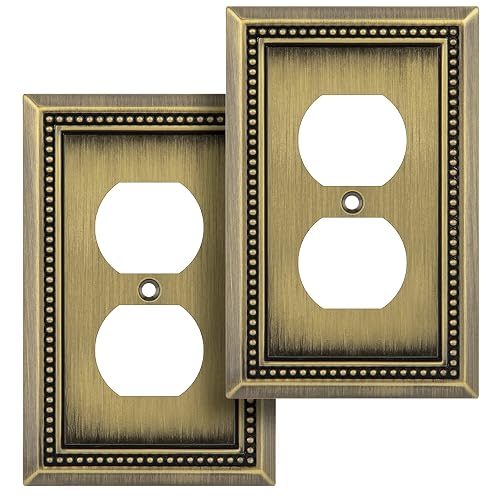
Manufacturers specify different fit ranges, so check whether the cover is designed for standard duplex receptacles, GFCI outlets, or AFCI outlets. A cover that fits loosely can pop out when a cord is pulled, so snug fit matters more than the color.
Step 3: Install Covers Correctly
Installation is simple, but a few details make the difference between a secure cover and one that falls off.
Tools and Supplies You Will Need
- A flathead or Phillips screwdriver, depending on the cover
- A non-contact voltage tester
- A soft cloth to clean the faceplate
- A small flashlight to check the slots
Installation Steps
- Turn off the circuit at the breaker if the cover requires removing the faceplate. Confirm with the voltage tester.
- Clean the faceplate area so the cover seats flat.
- For plug-in caps, press the cover firmly until both prongs are fully seated. Give it a gentle tug to confirm it holds.
- For screw-in covers, tighten the screws until snug, but do not overtighten, which can crack the plastic.
- Restore power and test each cover by trying to pull it out. A secure cover should resist moderate force.
If you are not comfortable working inside a wall box, consult a licensed electrician. Work involving live wiring carries real risk.
Step 4: Build Red Dot Covers Into a Room-by-Room Plan
Outlet covers are one layer. A complete plan also includes furniture anchoring, cord management, and a check of nearby hazards. In the living room, for example, pair covers with cord shorteners for lamps and TV connections. In the kitchen, pair them with stove knob covers and a plan for small appliances.
For ideas on matching covers to your decor, see What Color Outlet Covers Should I Use? White vs Ivory (2026). If you have outdoor outlets, the requirements are different and are covered in Leviton Outdoor Outlet Covers: How to Choose and Install Them (2026). For a comparison of tamper-resistant options, read Outlet Covers and Tamper-Resistant Outlets Explained.
Step 5: Check Covers Regularly
Covers loosen over time, especially in homes with frequent plugging and unplugging. Set a reminder to check each cover every month. Look for:
- Covers that wiggle or sit crooked
- Cracks in the plastic or resin
- Discoloration from heat near a heater or lamp
- Missing or worn shutters on sliding models
Replace any damaged cover right away. A broken cover can leave slots partly exposed.
Common Mistakes
- Treating the red dot as the whole solution. The dot marks an outlet; it does not guarantee safety by itself.
- Buying covers that do not fit the outlet type. Check dimensions for GFCI and AFCI receptacles before ordering.
- Leaving a cover in place on an outlet you actually use. Adults may forget to remove it and then force a plug, which damages both the cover and the outlet.
- Overtightening screws. This cracks plastic covers and can damage the wall box threads.
- Ignoring low outlets behind furniture. Many accidents happen where the outlet is hidden. Check these first.
- Using loose-fitting caps. A cover that pops out is worse than none because it creates a false sense of security.
Tips for Keeping Covers Effective
- Keep a few spare covers on hand so you can replace a broken one the same day.
- Store unused covers in a labeled bag so a visitor or babysitter knows where to find them.
- Teach older children that covers are not toys. Small caps are a choking hazard once removed.
- If you move a plug to a different outlet, check the new location for a cover too.
FAQ
Are red dot outlet covers the same as tamper-resistant outlets?
No. A tamper-resistant outlet has built-in shutters that block the slots. A red dot cover is an accessory that sits over an outlet. Both can be used together, but the cover does not replace code-compliant receptacles.
Do red dot covers meet electrical code?
Outlet covers are generally treated as add-on accessories rather than code-compliant receptacles. Check local requirements with a licensed electrician or your building department.
Can I leave a cover in place when I use the outlet?
Most solid plug-in caps must be removed before use. Sliding shutter types can stay in place if the shutter opens for the plug. Never force a plug past a cover.
How often should I check outlet covers?
A monthly check is a reasonable routine. Look for looseness, cracks, and heat damage, especially near lamps and heaters.
Are red dot covers safe for outdoor outlets?
Standard indoor covers are not designed for weather exposure. Outdoor outlets need weatherproof covers rated for wet locations.
What is the best height for outlet covers?
Cover every outlet within a toddler’s reach, which is generally anything below about 48 inches from the floor. Pay special attention to outlets at floor level.
Do I need a professional to install these?
Plug-in caps need no tools. Screw-in covers require turning off power at the breaker. If you are unsure, consult a licensed electrician.
Conclusion
Red dot outlet covers give you a simple way to block open slots and mark outlets for everyone in the house. Pair them with a proper outlet audit, a secure fit, and regular checks, and they become a useful part of a larger childproofing plan. Revisit your covers each season, replace any that are worn, and keep your room-by-room checklist up to date.
Related reading
- Wood Look Outlet Covers: How to Choose and Install Them Safely
- Unfinished Oak Outlet Covers: A Step-by-Step Guide for Toddler Homes
Ready to choose one?
About Ethan Brooks
Ethan Brooks is part of our editorial team and reviews and edits our childproofing guides, checking product details against manufacturer specifications and owner feedback.